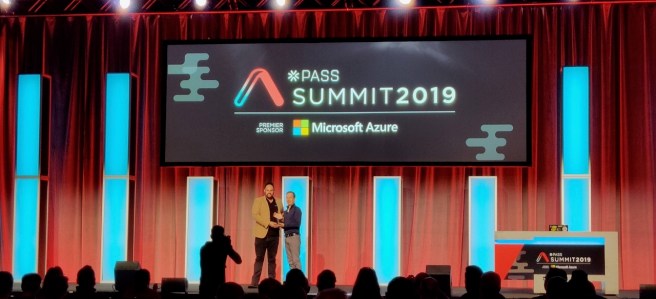
The annual PASSion Award is the highest accolade given to a PASS volunteer.
Presented during the annual PASS Summit conference, this award recognizes an individual’s exemplary service and commitment to the PASS organization, by inspiring our community of data professionals to connect, share, and learn.
I was lucky enough to be nominated for this award – people nominated me back in September 2019 – although I didn’t know that they had…
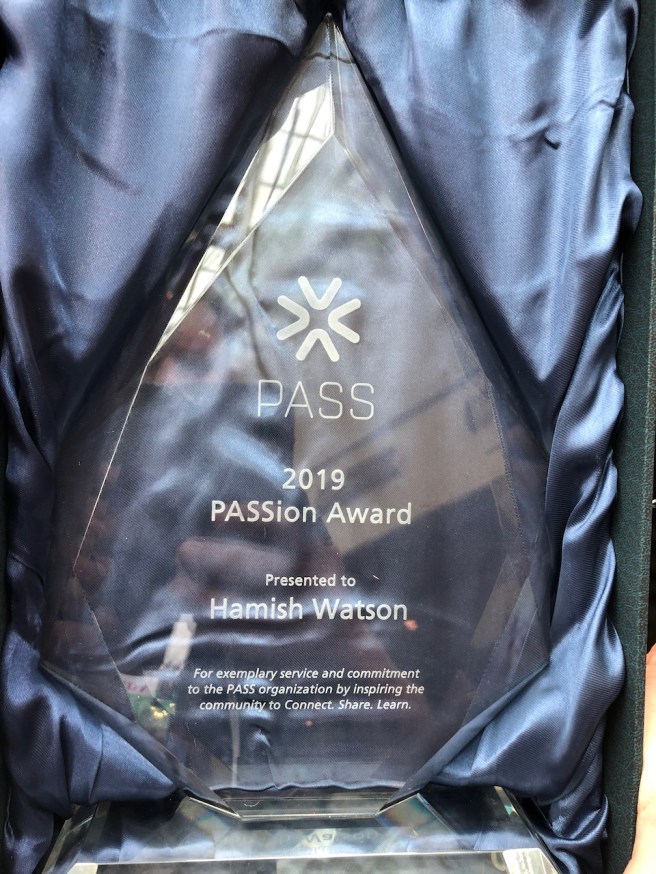
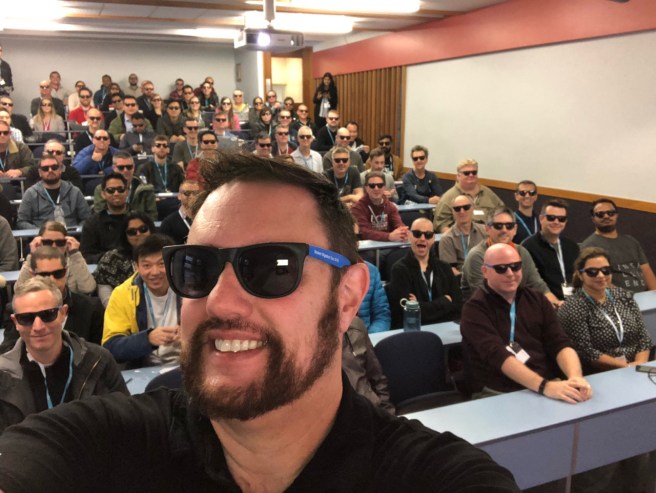
This is a photo of a humbled and nervous Hamish…The actual award – it’s heavy – it has pride of place next to my daughter’s dance awards 😊
During the recent weeks in COVID lockdown it got me thinking that I should celebrate this award – I had not publicised it – as to be honest I’m still very humbled by it…
So I would rather turn this around – you too can be awarded this – now is a great time to reach out to your networks, to help setup virtual conferences and volunteer for things that might not have existed or were possible before.
Give it a go – or on the flip side – when nominations open in September 2020 – nominate someone you know that makes a huge difference in our PASS Community.
Currently we have have the COVID-19 pandemic sweeping the world. Here in New Zealand we are currently in lockdown – what this means is that we Kiwis are required to stay at home.
Not go out – except to get groceries or go to the pharmacy.
What this actually means is that we are now at home with our families – but only our families. I am an extrovert… I love interacting with people. My lockdown is a bit different than most:
I recently travelled to Canada and returned to NZ on Friday 20th March and went into “self isolation” – as the NZ Government decreed any international travellers had to self isolate for 14 days. I had a friend who had an empty apartment so was planning to stay there for the 14 days – so as not to accidentally infect my kids – who then might infect their grandparents (who are over 70..).
So I stayed by myself 30 kilometres (20 miles) from my family. However NZ went into lockdown 6 days into my self isolation so I made the decision to go home and self quarantine myself in 2 rooms (one of which had a ensuite bathroom). Luckily my main client has allowed me to work remotely which has helped my sanity greatly and means I’m not unemployed….
I am now 12 days into my 14 days and I thought I would share how I, as an extrovert, have coped and managed my isolation – from people.
These were my things that I came up with – yours will be different so these are only suggestions. Like the pyjamas suggestion – for me I need to have a state change to get into work mode
Stick to a routine
Go to sleep and wake up at a reasonable time, write a schedule that is varied and includes time for work as well as self-care.
Still dress well
Get showered and dressed in comfortable clothes, do the normal things you did. Don’t wear pyjamas all day (but you know what – if that works for you – do it.)
Go outside for some fresh air
Get out at least once a day, for at least thirty minutes. If you are concerned of contact, try first thing in the morning, or later in the evening. Remember you only need to keep 2 metres or 6 feet away from people.
Even just opening a window and letting in fresh air helps.
Talk to people
This was a huge one for me and I had some wonderful friends who WhatsApp video chatted, Teams “meetings” and even employees at my client site who regularly contacted me to talk. It was a massive difference to my wellbeing.
For you – you might not like video chats – but please keep in contact with people via text messages at least – it will let them know you’re ok. Or if you’re not OK then you have a way of interacting with your support network.
Be silly
I have a friend who sends me a picture of a beer every day – a different beer and his description of that beer. It has made me laugh and kept me slightly sane – because I’ve had to think of witty replies back. Gold.
Eat well
Stay hydrated and eat good food. This one may seem obvious, but stress and eating often don’t mix well, and we find ourselves over-indulging, forgetting to eat, and avoiding food. Drink plenty of water, eat some good and nutritious foods, and challenge yourself to learn how to cook something new!
Spend time being a kid
If you have them – spend time with your kids – being a kid.
Spend extra time playing with your kids, or if you don’t have any – go play some games, do things that you normally wouldn’t that might bring some playtime to your life. Play is cathartic – for kids and adults too.
Respect each other
Have a space – it’s yours to retreat to.
It is important that people create their own separate space for work and for relaxation. For children, help them identify a place where they can go to retreat when stressed. My house currently has 3 “forts” built that the kids use to “get away from it all”.
Kids will be kids
And adults will be grumpy.
Kids thrive on routine and that routine has likely been upended – same deal for adults. So expect behavioural issues with kids and adults too – expect increased anxiety, worries and fears, nightmares, difficulty separating or sleeping, testing limits, and meltdowns. Focus on emotional connections with your close ones. They need you as much as you need them.
Self-acceptance is key
We can too easily be hard on ourselves..
..be a bit easier on yourself, accept that you might fail at some things. These are huge unprecedented times and accept everything about yourself, your current situation, and your life without question, blame, or pushback. You cannot fail at this.
Exercise – if its your thing..
I setup a small gym (weight bench and 4 dumbbells of various weights) in one of the rooms I am quarantined to. I have to say that doing weights has helped my state of mind GREATLY. For you it might just be a 30 minute walk out in the fresh air to get away from things. Exercise is good – you don’t have to run a marathon – just that physical state change.
That thing you keep putting off..
You probably have a project that you’ve been meaning to do but haven’t (I know I do – there are a heap of things on my rural property I could be doing that don’t require me to leave it!!). Find something that will keep you busy, distracted, and engaged to take breaks from what is going on in the outside world.
Reach out for help
We’re here for you, we care.
Keep up your medications and if you do them – therapy sessions the best you can. If you are having difficulty coping, seek out help for the first time.
Chunk it out
Take each day as moment by moment. Break your day or tasks up into manageable chunks. It’s like the analogy of eating an elephant – you do it bite by bite (BTW please don’t eat elephants – they’re awesome creatures!!)
This is temporary…
It might seem like this will never end – and uncertainty is worrying. Although this is scary and we’re in difficult times it will pass in time.
Most of all – be you
…and remember to converse with others – however works best for you
We’re in this together.
Let’s chat
Do you know me? Reach out and say hi.
Don’t know me? Reach out and say hi – I like to talk, listen and make people laugh. hamish@morphit.co.nz
And please – remember:
Be Safe
Be Strong
and most importantly:
This article is about my own experiences in making my user group and community events more inclusive for people from diverse backgrounds. I am going to use growing my user group as an example as this one was an example where making small changes had a dramatic effect on my community. I’m hoping it can help you look at how we can grow our community and be more inclusive.
Beer and Pizza – stalwart of any tech event, right?
My user group was lucky enough to have some funding for drinks and food. This is typically beer and pizza. When I took over the user group in late 2015 I noticed there was a number of people who were not eating or drinking. They were also just sitting in groups by themselves whilst the rest of us were standing around eating pizza and drinking beer.
I didn’t like that, so I thought: what can I change?
I made a small change – I didn’t buy as much beer and instead bought an assortment of non-alcoholic beverages (e.g various soft drinks and water) as well as changing up the pizza flavors to include vegetarian options as well. This had a dramatic effect in that people were more engaged since the people who used to just sit by themselves in the corner now were all also standing around enjoying pizza and communing with the rest of the user group.
Start small – you can’t change the whole world
My initial steps were to start with my own user group – to see what effect I could have at a small scale. I was interested to see if by opening up my user group, would that have a flow-on effect both to my local SQL Saturday event and more importantly – within the greater Christchurch community?
As above, I made a small change – I started small by making food and beverage (F&B) options more inclusive. This resulted in more and more people from diverse backgrounds who previously would not have come along finally showing up. The user group grew almost 3X from 300 members in 2015 to over 830 in 2019. Word began to spread that there was an event dedicated to helping people learn, but also provided food that was inclusive to people from different cultures. Also, special dietary requirements are something that I try my best to accommodate as well.
Get some help from like-minded people
When I first took over the user group it was run by three men, so when I started in a leadership capacity I asked one of my friends who was female to join us. Sarah had been involved in helping out with SQL Saturday so it was a no brainer for me. What occurred was that because Sarah was involved in other community activities, and specifically Women in IT groups – it meant that she helped bring more women to the user group. It also meant that more women came along because Sarah was there at the beginning of the night during the social part, and so people were more engaged (of course, it helps that Sarah has a warm bubbly personality makes people feel welcome too!).
It isn’t just about you.
In order to grow my user group further, I started attending other user groups as well, often speaking at several of these events too. When I spoke at other user groups I invited people to come along and learn about data. However I didn’t just go to technical user groups; I also visited other community social group and events (for example, I had friends in the Indian and Iranian communities and spoke at their events about career development). I talked about a culture of true community and how we all had a part to play in looking out for each other.
I mentored young students who wanted to know what they should do to get their first job. Sometimes, I even introduced them to their first boss! Often, I would also look out for tech conferences or university events to attend either as a speaker or as a volunteer in order to further build community.
My aim was to instill a culture of community collaboration. Now, we were all part of a broader technical community – it wasn’t just “the data people”, or the “the .NET team” but rather an inclusive and diverse group of technologists learning, connecting and helping each other out. When the horrific Christchurch attack happened on March 15 – it was this very communal connection between disparate groups that brought our community closer, and helped us in healing.
Being extroverted isn’t always a good thing
If you’ve met me – I’m, ahem, loud. Or a nicer way of putting it is that I’m passionate about everything I do. Which means I get excited about “making stuff go” – whatever stuff is.
It is easy for others to say, “Well you’re an extrovert; this is second nature to you.”
However, being extroverted can have both positive and negative effects. Positively, it can inspire people to make changes, to embrace new things and this worked very well in my career when I had to get a room full of people energized to create, fix or manage solutions. This has flowed on into my community activities in getting people to help grow the community.
There is however a side effect to this, and it is that passion sometimes can put people off. It can be overwhelming for introverted people and also people whose culture is more quiet and measured. It has taken me some time in my life to know when to tone it down. This happened in my career in 2003 when I had one of the best technical people working for me, but they were very quiet and my team had a very vocal culture. Also, I was the leader of the team and I’m – well – loud. I could tell this person did not feel included, so instead of walking over and talking face to face which I knew made this person felt uncomfortable, I would instead email/text instead. Also, rather than having team activities at the pub after work, we did a range of other inclusive team activities instead.
The amazing thing that happened was that this person met me halfway – I learnt to become a better listener, and they became a more proactive communicator, and would even walk over to my desk and initiate conversations!
I then decided to try this same approach with people from other cultures that tended to be more reserved. I practiced speaking in a quieter voice, improved my active listening skills and learnt to ask a heap more questions that I normally would – this had a great effect because it engaged them in conversation and allowed them to actively participate.
This approach takes time, effort and requires constant focus of the end goal – to make people feel included no matter what their diversity is. It is certainly not an easy skill to develop, but it’s possible!
It can WILL feel a bit uncomfortable for you
This process is not meant to be easy or comfortable. There will be times when there are misunderstandings because of language barriers, cultural differences and social nuances. You will need to be socially aware, and ensure that you address any miscommunications in an appropriate manner. Be careful of your personal biases as well. My technique is to reframe the question from another perspective, share context or describe what I’m talking about another way that might help people understand better and connect.
There have been times where I have gone to an event to support a community, and yet felt like I didn’t belong, didn’t know what was going on and afraid to offend others. However, even though I felt uncomfortable in those situations, I stayed anyway because my goal was to be there and help others. That said, I often think to myself how great it would’ve been if the event organizers had cared enough to ask what they could’ve done to make the event more inclusive.
If you don’t know or are not sure, ASK!
After the March 15 Christchurch shooting, I wanted to donate gifts to children who had lost their parents in the tragedy and show support however I could. This involved attending the local Eid al-Fitr celebrations to mark the end of Ramadan. I’d never been to Eid before, I’m not a Muslim and I was not sure what to do. I looked it up online and spoke to some of my friends who are Muslim to get an idea of what I needed to do or expect. Whilst attending it I did feel overwhelmed at times, but luckily for myself I had a purpose to bring some small gifts to kids to show that the greater community cared for them. That helped me during those times. I wouldn’t say I felt uncomfortable, but I was outside of my comfort zone and it was during this time that I internalised:
“…now I know how it feels for others who feel that they don’t belong.”
Since then, it has been an important reminder for me to be more inclusive and continue to help others more as I don’t want people to feel like that at my events, or at any other events. I make a point of saying hi to anyone and everyone who is willing to engage, and always remind myself to be respectful to all dimensions of diversity – be it race, gender identity, religion etc.
The one step that makes a difference
I hope this article helps you in some way to look at how you can boost diversity and inclusion within your own community, wherever you are in the world. I used my user group as an example of how small changes can have a big effect on diverse membership and also helping people feel included. Yet, this is a continuous, ongoing effort because just making one change is not enough – we have to do more. We need to do more.
Often what I thought was fairly straightforward was not for others – so my small step resulted in a big change for others. Often we overlook things that we assume “everyone gets it” ; however, as an example from a technical stand point, my most popular blog posts are the ones that I wrote thinking, “This is so simple that no one will read this.” But I realize that what I might assume to be simple might be a hurdle for someone else. This is true for people who are diverse – what might seem easy for me as a European Maori male who has been in the IT industry for 20 years – those things can be quite difficult for others because I, too, am privileged.
Perhaps you might feel that all this requires too much change and effort. There is a fear of change that is natural to humans – we are wired to react with distrust when the status quo is challenged. What happens is that we narrow our perspective and “circle the wagons” which is the opposite desired effect of creating a more inclusive community.
I ask you to look at these changes from a positive perspective, which is why I wrote about my own experiences to show you that it isn’t always easy but by remaining focused on the goal of helping include people and to embrace diversity – it creates potential for positive change. Celebrate any and all small successes you have and then use that to drive more improvements to have even bigger success. This will give you a good foundation to work from and more importantly will make others think about their own actions and maybe change how they embrace diversity and inclusivity in their own lives/workplace.
Let’s work together to make our community a better, kinder and more inclusive place, and become better people too.
This blog post is why I decided to run for the board, why I think I am qualified to be a board member and the vision of where I think the board needs to go.
I had thought about running for the board for some time – I have been a member of the PASS community since 2013. I’ve been a User Group leader since 2015 and lead organizer of SQLSaturday South Island since 2016. I have always been someone who cares about what is going on and was a peer support person for new students at my high school and through university as part of the Māori student community. I’m 1/4 Māori and helping my extended student family (whanau) was important to me.
PASS is a global community and it has helped me extend and stretch myself – because without becoming a member of our community I would never have travelled around the world helping others make a positive change in their lives through my talks.
This outward looking viewpoint is probably as a result of being a New Zealander – we’re a small country that does big things. We were the first country to give women the right to vote in the 1890s, we had reforms in the 80s that meant that people of any gender, race and sexuality could be considered a “Kiwi” i.e. we all are one – we should treat each other as one. I try and live my life according to those foundational goals of my country, specifically around helping others who are not included or represented.
I bring to the board a viewpoint that we need to be aware of inclusivity and the diversity of our community. It has been encouraging to see the actions that PASS have started to take and whether or not I get on the board – I want to help continue those steps.
I wrote an article this year around how I and my fellow MVPs need to consider other people:
It shows how even at grass roots level we all have a part to play to help people and make sure that they are included, supported and have a positive experience with us.
Two of my endorsements for the board were Reza Rad and Rob Farley- two people who have mentored me over my community career and their tutelage over the years has encouraged me to help others. I have mentored students in India and helped them get their first job, I have helped SQLSaturdays get off the ground in new places – I do this because I know what it is like to have to ask for help. I want to be the person that approaches people and say “can I help?”
Applying for the board is my way of saying to my PASS community – “can I help?”
My vision is to bring some of my positive attributes – I am passionate about helping others, my drive is for people’s viewpoints to be heard and acknowledged and I like to incorporate openness in all the things…
Our technology platform is evolving – we’re Data Platform instead of just SQL Server – the role of the DBA is evolving too (Data Engineer and the like) and PASS needs to be a part of this evolution. To be both a leader in the education space and also to serve our changing community.
Your vote is important and this year we have an awesome strong contingent of people who care deeply about our community. It is very encouraging for the direction of where PASS will go to see more people from around the world put their hand up and say “I want to help guide our community”. I stand amongst champions this year and if I do not get on the board – I know that the other people will make a difference.
My mantra for everything in my life is “make stuff go”, I like to connect disparate technology and people where others say it can’t be done. After the March shootings this year in Christchurch I saw a community that was hurting and needed some help. I helped them “make stuff go”. I was told for certain things it couldn’t be done – I refused to accept that and even now I’m still involved within that community helping and just being someone that they know cares.
That is what I want to bring to the board – to bring together disparate cultures, viewpoints and thoughts – to bring it together towards a common goal of connecting us all as a global community.
I want to MakeStuffGo and I hope that you do too – if you see me – please stop and have a chat. I want to hear about your experiences, your thoughts, because for our community to grow it needs voices to be heard.
#VoteHamish
but more importantly – #Vote – the number of people who vote in the past are low – and I hope that this year you all will take some time, read the bios and place three votes to make a difference.
Feel free to read Steve Jones (t | w) blog post endorsing myself and 2 other candidates:
To be eligible to vote in the 2019 PASS Election, PASS members must have completed their myPASS profiles by June 1, 2019. (If you’re not already a free member of PASS, there are many reasons to join, including the wide variety of Virtual User Groups, free training, and ability to interact with your chapters and SQLSaturday events!) Voting will commence at 11:30am Pacific Time on November 6th until 12:00pm Pacific Time on November 12th. Election results will be announced November 13th.
It is very interesting going back and reading that first blog post.
It was mostly thanks to my late great mate Tom Roush (t | w) who 20 months later I still miss dearly….
Tom said to me that I should write stuff – to help others. He helped me become a way better person within the community – both SQL Server community and others.
This blog post is dedicated to a wonderful guy who cared and had a wonderful mischievous laugh.
Back in 2016 I wrote 2 blog posts – it was November 2016 so it wasn’t too bad.
Each year I wrote more and Tom would give me constructive feedback on some of the topics etc.
I found that some of the blog posts that I thought were the simplest ones that no one would read were in fact the most popular:
I get the occasional email/comment from people thanking me for writing the three posts above – yet I really only wrote them to remind myself when I had to do them!!
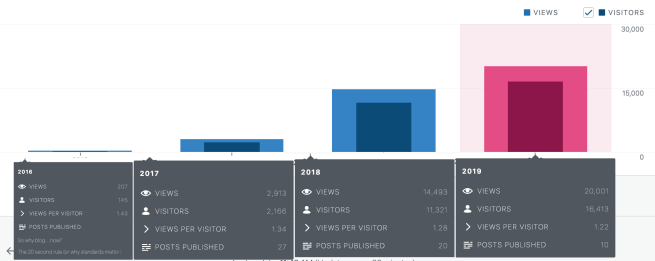
Anyways – each year I gave myself a goal to achieve in terms of views – and subsequently failed.
2017 – 3,000 views X (2,913 – so close!!)
2018 – 15,000 views X (14,493 – agonisingly close…)
2019 – I decided that I would try for 20,000 views and I’m happy to say that on day 293 of the year I achieved it:
I’m glad that I have continued blogging and writing posts that help people.
This blog post is how to get git going after upgrading to Catalina (10.15).
I use git as a method of storing all my presentations and work files. It was a great way to learn how to use git. I use git commands and run them in the Terminal app on my mac.
However after upgrading to Catalina this weekend:
Problem:
I always run
git status
to see what changes I have locally.
I then run
git pull
in case I’ve made change to source control on my other computer and need to merge changes.
This blog post is about the situation where after upgrading to the latest macOS version 10.15 – also known as Catalina – you may not be able to share your screen content.
All that will show is your background…..
Resolution:
Click the Apple in the upper left hand corner of the screen > System Preferences > Security & Privacy.
Click the Privacy tab at the top of the dialog box.
Scroll down on the left hand side of the screen to Screen Recording.
Check the box next to GotoMeeting.
You will be alerted to quit GotoMeeting before the change can take place.
Then re-start GotoMeeting. You will be all set to now share your screen.
Do that and you’re all good – note this might affect Skype and Teams – so follow the same procedure there.
This blog post is around the changing landscape of both SQL Server and the people who are our trusted guardians of it – DBAs.
If you have been involved with SQL Server in the past 5 years, you will have seen some fantastic changes within the product. Where once we worked on SQL Server—we now work on a Data Platform. Microsoft has evolved the name of the SQL Server platform for very good reasons.
These days data exists both on-premises and in the cloud—data is being retrieved from Big Data running on Kubernetes clusters, it is being consumed by open source services that are interfacing with cognitive intelligent applications and data is being used with AI and Machine Learning models to provide predictive analytics. Our usage of data has also changed dramatically in the past 5 years, and with it, our administrative guardians of that data, the DBA, must also evolve with these changes
This article will help the reader who is trying to determine what they need to do to remain relevant—and more importantly—employable.
Embrace DevOps and Automation:
“Automation will kill the DBA” this statement is wrong – automation will enhance the DBA. Deployments that were manual and disjointed can now be automated and by utilizing DevOps principles like Continuous Integration (storing the database model/code in source control and automating the building and testing of it) and Continuous Delivery (automating the repeatable, reliable release of that code through consistent environments).
There are open source (free) tools for automating a lot of manual database processes and tasks, for example https://dbatools.io which is a community-driven project helping DBAs work better. By automating a lot more it means DBAs will have more time to be proactive, to tune their systems more and to have time to upskill for the evolving platform that they manage.
Consider the Cloud as your next Server and Skillset:
Cloud-based computing has revolutionized industry and the same can be said around database management. No longer do DBAs need to be tethered to their infrastructure, looking at what security patches need to be applied or how to manage on-premises capacity constraints within their database ecosystem.
Cloud-based databases are shifting DBAs from hands-on guardians of databases to value-drivers for their businesses. I use the term value-drivers because cloud computing does cost money, where provisioned incorrectly it can cost a lot, and if DBAs have the skills to tune databases then that compute cost can be reduced.
The changes that the cloud brings are:
More higher quality deployments, less weekend work
More automation, less hands-on work
More data enrichment, less database maintenance
More growth in data, less resource constraints
The growing importance of cloud-based data and databases frees up DBAs from mundane, tasks, and provides more time to work directly with the business on ways data can be applied to market driven needs. The cloud also opens the door to DevOps; through the use of consistent tooling and automated processes, the work of DBAs, developers and operations teams are synchronized to deliver value at a velocity the business requires.
Lastly, by embracing the cloud and what it has to offer, DBAs have the greatest ability to advance and extend their career opportunities that they’ve had for the past 25 years.
Understand How The Platform is Evolving:
If we look at Big Data clusters—these are typically run on the Linux platform or on containers within a Kubernetes cluster. These clusters need to be provisioned and how they integrate together needs to be understood by all involved. What this means is DBAs need to become more general technologists. DBAs need to understand how SQL Server will run in a container, they need to look at how R, Python, Bash and PowerShell are languages they need to know in conjunction with T-SQL. The role of the DBA now encompasses more intelligent tooling that can manage and report on data infrastructure and processes across a wide variety of platform technologies. Hint: SQL Server doesn’t just run on windows server anymore…
Conclusion:
Data has never been more important to organizations, and no individual has a better understanding of how to manage and ultimately harvest that data than the DBA. However, with the evolution of the Data Platform to be more self-autonomous, DBAs will be under increased pressure to prove their value. Whether that is learning open source tools, big data clusters, cloud technologies, or performance monitoring processes, that is up to the DBA. The DBA has to evolve, like all professions that have with the introduction of cloud and automation, but the role itself is unlikely to ever disappear—the name could even evolve to become “Data Platform Engineer”.
If you are going to PASS Summit this November, then I feel the following sessions would greatly help you on your evolving career path within the Data Platform:
I’m happy to say that I have indeed been doing a whole heap more on containers and have been using the Azure Kubernetes Service (AKS). Admittedly this has had to be in my own spare time as I have found that my clients are not ready to embrace either containers or AKS for SQL Server yet.
In fact a fair chunk of my clients need help getting SQL Server tuned optimally….
But in my spare time I have been folding AKS into CI/CD pipelines and looking at as much as I can.
In fact I am speaking about AKS in the following places:
This blog post is about a situation that initially perplexed me – I was installing SQL Server 2017 onto a new DEMO machine – running Windows Server 2019. This install is one I have done over 50 times, if not more.
Halfway through I got an interesting error that (1) I’ve never seen before and (2) did not expect post SQL Server 2014.
MSI Error: 1706 An installation package for the product Microsoft SQL Server 2012 Native Client cannot be found. Try the installation again using a valid copy of the installation package ‘sqlncli.msi’.
And it then asked me to locate the install files for SQL Server 2012 Native Client.
I (obviously) could not find those as I had not installed it – so I downloaded the native Client off Microsoft’s website and then proceeded to get this error:
If a later version is installed – why does the installer want me to install it…??!!
At which point I wondered what the heck was going on….
Until I remembered that unlike my normal setup I had installed Visual Studio 2019 on the VM first. So I looked in Programs and Features and lo and behold there was SQL Server Native Client:
Huh – I didn’t install that… oh wait – Visual Studio probably did!!
I also noticed SQL Server 2016 LocalDB which is installed by Visual Studio – which I made a note to upgrade to version 2017 as this can cause issues with things like the TRANSLATE function that was introduced in SQL Server 2017.
So I uninstalled SQL Server 2012 Native Client and reinstalled SQL Server 2017 Developer Edition and boom!! – it worked.