In the realm of software development and content creation, the deployment pipeline serves as a crucial bridge between innovation and implementation. Whether you are fine-tuning code, testing new features, or releasing a polished product to end-users, the deployment pipeline guides your content through distinct stages, each playing a vital role in ensuring a smooth and efficient journey from development to production.
The Structure of Pipelines
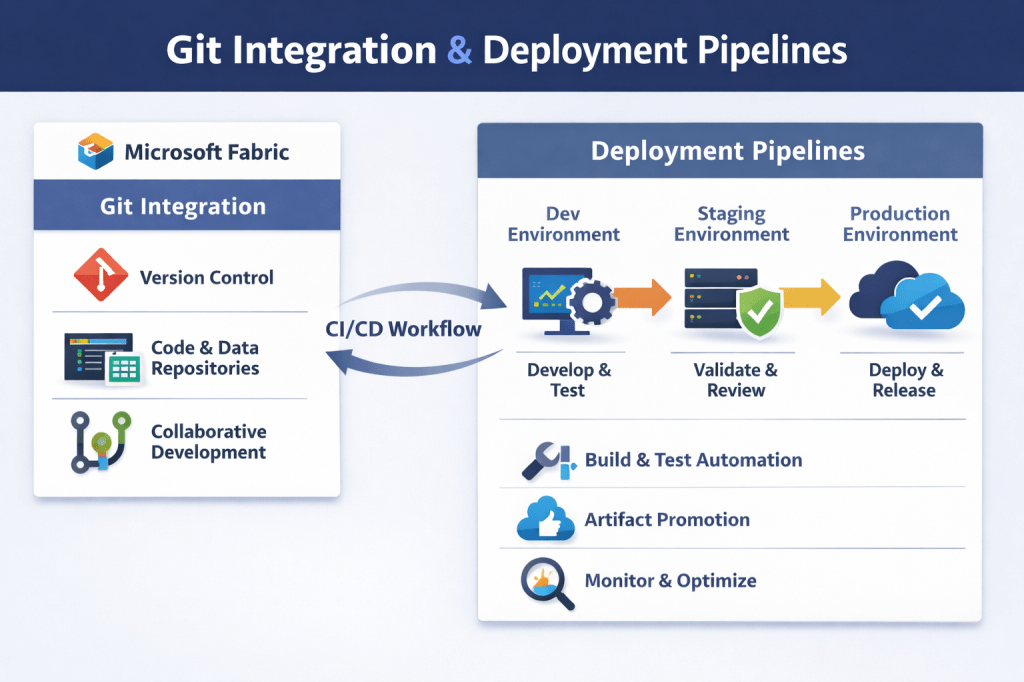
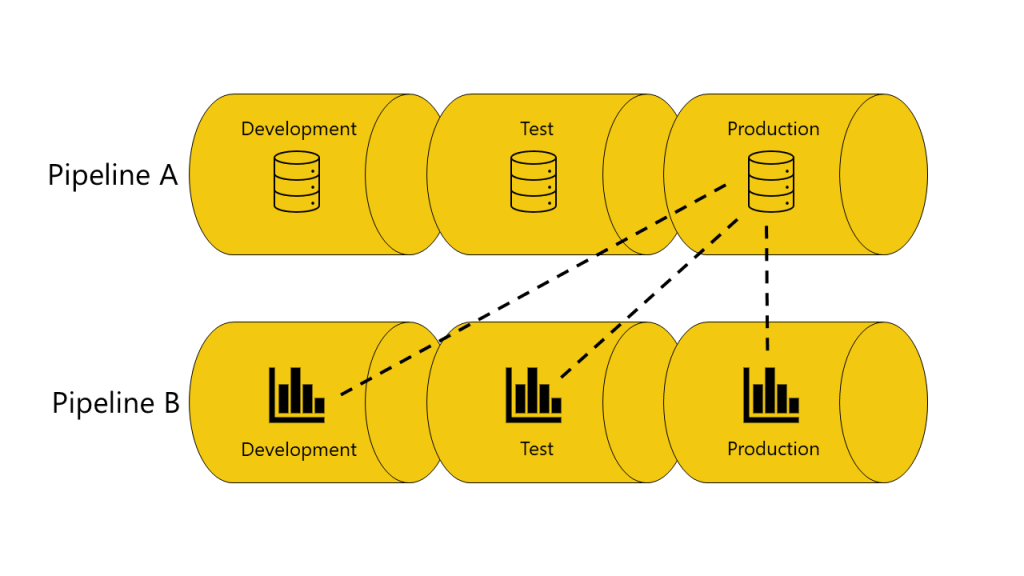
Here’s how the stages of a Microsoft Fabric deployment pipeline typically work:
1. Development Stage: The journey begins here. Developers and creators upload fresh content, tweak designs, and build the foundations of their projects. This stage serves as the birthplace of ideas, where the initial spark of innovation ignites the development process.
2. Test Stage: Once the development work is complete, the content moves to the test stage for scrutiny and refinement. Testers and reviewers come into play, ensuring that the content meets quality standards and functions as intended. It’s here that load tests, user experience trials, and final checks take place to iron out any creases before the big reveal.
3. Production Stage: The ultimate destination of the deployment pipeline, the production stage heralds the grand unveiling of your content to the wider audience. Here, the final version is shared with business users, marking the culmination of the creative journey and the beginning of a new phase in the content’s lifecycle.
Item Pairing
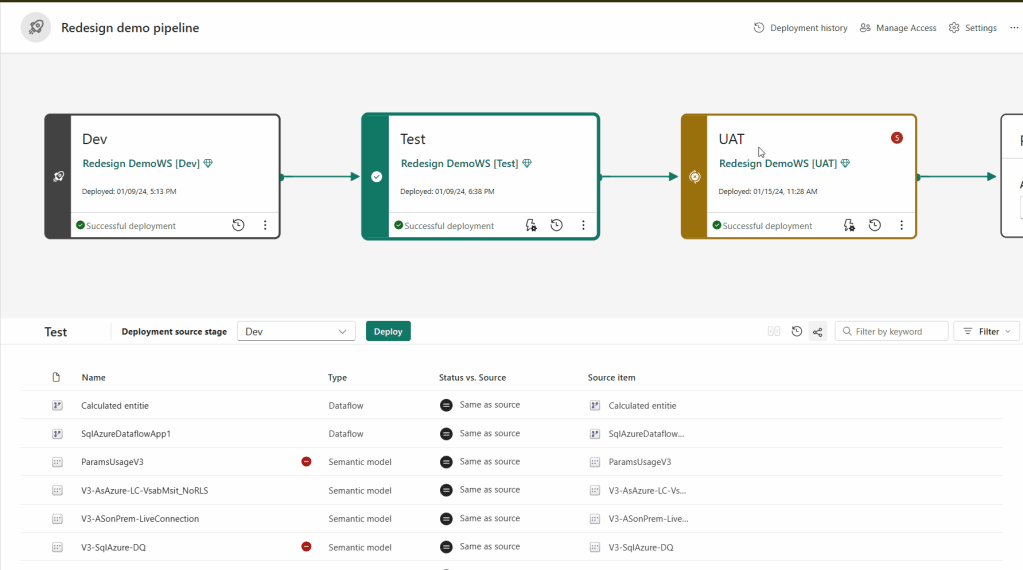
Pairing is basically Fabric’s way of keeping things in sync across your deployment stages. Think of it like matching socks: one sock in the dev stage pairs with its twin in the test stage. That “twin” could be a report, a dashboard, or a semantic model. Pairing happens when you assign a workspace to a deployment stage, or when you deploy new content that hasn’t been paired yet (what Fabric calls a clean deploy).
Why care about pairing? Because it determines what gets copied, what gets overwritten, and, sometimes, what causes a deployment to throw a tantrum. Here’s the tricky part: just because two items have the same name, type, and folder, doesn’t mean they’re paired. If they aren’t, a deployment won’t overwrite the old item. Instead, Fabric creates a new copy and pairs it with the item in the previous stage.
Paired items show up neatly on the same line in your pipeline content list. Unpaired items? They get their own lonely line. And here’s a fun twist: once items are paired, they stay paired—even if you rename them. But any new items you add after assigning a workspace to a pipeline won’t automatically pair, so you could end up with identical items in adjacent workspaces that aren’t actually linked.
Deployment Methods
Deployment pipelines are where the magic happens. They give content creators a “production playground” where teams can collaborate, manage, and promote organisational content through its lifecycle.
Think of a pipeline as a series of stages. You get to decide how many—anywhere from two to ten, with three being the default, each stage representing a checkpoint of development, test, and production. When you deploy, Fabric copies the selected content from the source stage to the target stage, following the aforementioned pairing rules. Fabric keeps the folder hierarchy intact in the target stage, which allows you to pick items only from the same folder level, and cherry-pick items across folders, no matter where they live in your workspace.
When deployment happens, paired items in the target stage get overwritten, while items with no match stay untouched. This ensures updates land exactly where they should, without breaking anything else.
Extended Reading
If you’re ready to get hands-on and see exactly how to set up deployment pipelines, pair items, and move content across stages in Microsoft Fabric, Microsoft has some great step-by-step guides. Check out these resources for all the details:
Get started with deployment pipelines
The deployment pipelines process
Compare content in different deployment stages